
First here are shots of some of the individual parts involved:
Quickchange center section (Rodsville)
Original 1940's Halibrand rear cover
Original 1940 ford tubes
Original Ford ring and pinion
Original Ford Axles and Differential
Brand new bearings and races


The first thing that I do is set up the differential bearing pre-load. I do this by placing the left side axle tube on the quickchange and bolting it down without any gasket.

Next I take the differential and put one axle in. Then place the spider gears on top and take a piece of rope with knots in the end and wedge it between the spider gears. After that I place the top of the differential on and bolt the ring on.
Next I place the differential in the quickchange and bolt on the right side axle tube. Then I stand the left side axle tube up in the air with the axle sticking out. This allows me to place a nut on the axle and use my inch pound wrench to take a measurement of the differential bearing pre-load. And because I have the rope inside the spider gears that makes the whole assembly turn.
If the reading is too high then I place special gaskets between the right axle housing and the center section until the reading drops to where I want.


Once I have the proper amount of differential bearing pre-load I assemble the differential with both axles and torque down the nuts for the final time.


The next step is to put in the lower shaft and it's bearings, and the pinion and its bearings and double race.
The center section is heated to 300 degrees in an oven to expand the case, and all the bearings and pinion are placed in the freezer to shrink them down. That way everything just slides into the center section.


Once the center section has cooled down completely I torque down the nut on the pinion to set the pinion bearing pre-load. I check back and forth with my inch pound wrench to make sure that the bearing pre-load is accurate. Then once I have that right I place on the flange washer and the other nut and lock the two together.

The next thing to check for is the backlash between the ring and the pinion (basically its the amount of movement the pinion has before it turn's the ring). I completely assemble both tubes, differential with axles, and gaskets all on the right side. With the gaskets on the right side that moves the ring away from the pinion as far as possible. Then I use a dial indicator to measure the backlash. If the backlash is too much then i'll take one of the gaskets from the right side and move it to the left side. Which moves the ring a little tighter to the pinion. I do this until I have the correct reading on the backlash.

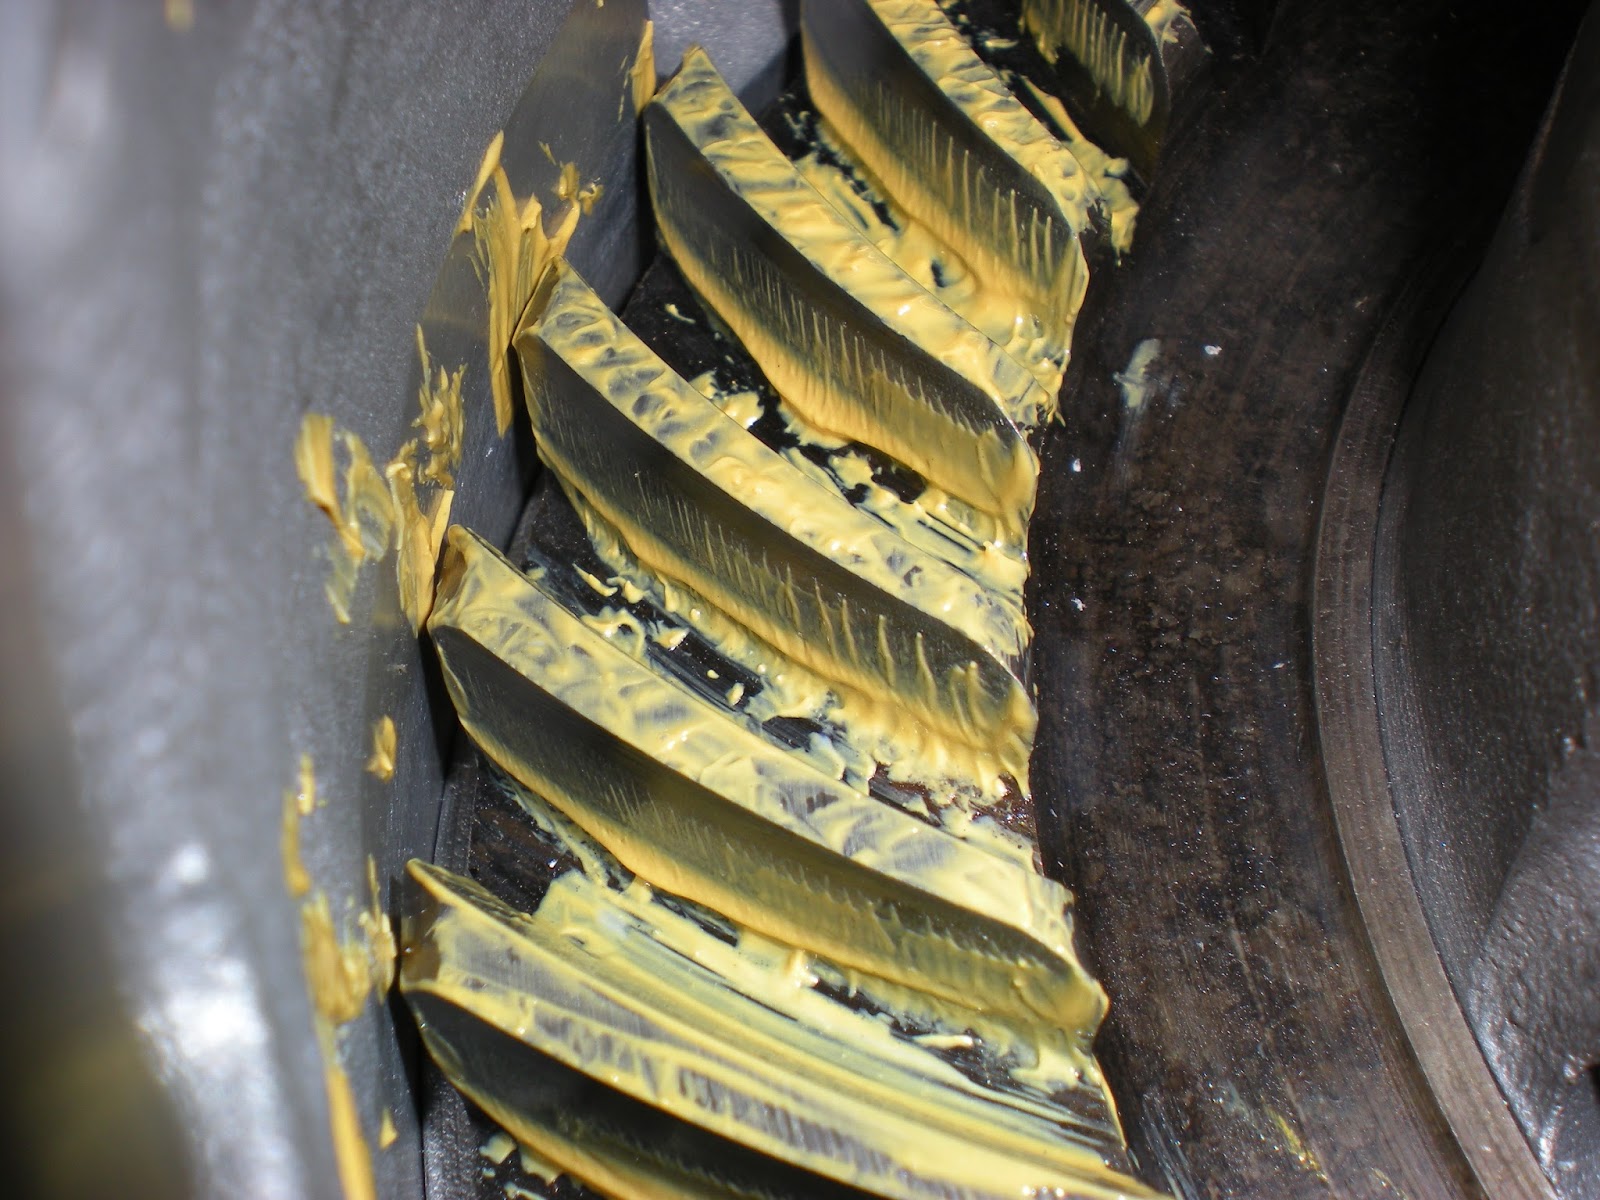
Once that is done I put a special marking compound on the ring to check the gear mesh. I turn the pinion around for a while then I check to see what type of pattern I have. This one has a good pattern that is all the way across.
Now it's ready for the end seals, and the tubes to be placed on for the final time.


I placed a bead of sealant on both the tubes and got them torqued down. So now the axle is completely finished.


Great write up. Thanks for posting this.
ReplyDeleteWow - very impressive. Thanks for taking the time to get this in writing
ReplyDelete